Category: Learning Center

iOS 8.2 Beta 2 Firmware Download and iOS Update

You probably know that Apple killed the door to jailbreak iOS 8.1.3. However there is still a turnaround. If you would like to perform an untethered jailbreak on your iPhone, iPad or iPod touch that is upgraded to iOS 8.1.3, this guide will help you out. The trick we use here is to update the iOS version to iOS 8.2 beta 2, and then jailbreak the device via Taig jailbreaking tool.

How to Upgrade Your iPhone, iPad, iPod Touch to iOS 8.2 Beta 2

The upgrade is available for following iOS devices:

  • iPhone 6, iPhone 6 Plus, iPhone 5S, iPhone 5C, iPhone 5, iPhone 4S
  • iPad Air, iPad 4, iPad 3, iPad 2
  • iPad mini, Retina iPad mini
  • iPod touch 5G

You need to download and install the latest iTunes onto your computer. Please be sure to back up your devices before the update. How to:

  1. Plug into your device and launch iTunes
  2. Click your device on the upper right corner
  3. Click Back Up Now and wait for the sync to finish

Ready to Go!

Step 1. Download the IPSW firmware that is compatible with your device model.

Step 2. Open iTunes on your computer and connect your iOS device using USB cable.
Launch Latest iTunes

Step 3. Click iPhone, iPad, or iPod icon in the top left navigation bar and get into Summary tab.

Step 4. Hold Shift key on computer keyboard and click Restore button, select the downloaded IPSW firmware and click OK
Update to iOS 8.2 Beta

Step 5. Wait for the process to finish. Unlock your iOS device with your passcode if prompted.

Step 6. You will see the UDID of your device in iTunes and be asked to register. You can use registration services here or here, which costs $4.99.

Good News: If you purchased iKeyMonitor 12-Month License from our affiliate http://ikeymonitor.com, you can contact them with your order ID and UDID to get a free UDID registration.

iOS 8.2 Beta 1 for iPhone and iPod

Device Model Size Direct
iPhone 6 Plus 1.96 GB Direct
iPhone 6 1.96 GB Direct
iPhone 5S (GSM, A1453, A1533) 1.96 GB Direct
iPhone 5S (CDMA, A1457, A1518, A1528, A1530) 1.96 GB Direct
iPhone 5C (CDMA, A1456, A1532) 1.96 GB Direct
iPhone 5C (GSM, A1507, A1516, A1526, A1529) 1.86 GB Direct
iPhone 5 (GSM, A1428) 2.1 GB Direct
Phone 5 (CDMA, A1429) 1.1 GB Direct
iPhone 4S 1.1 GB Direct
iPod Touch 5 1.1 GB Direct

iOS 8.2 Beta 1 for iPad

Device Model Size Direct
iPad Air 2 (Wi-Fi, A1566) 2.1 GB Direct
iPad Air 2 (Wi-Fi + Cellular, A1567) 2.1 GB Direct
iPad Mini 3 (Wi-Fi, A1599) 2.1 GB Direct
iPad Mini 3 (CDMA, A1600) 2.1 GB Direct
iPad Mini 3 (TD-LTE, A1601) 2.1 GB Direct
iPad Air (Wi-Fi, A1474) 2.1 GB Direct
iPad Air (Wi-Fi + 4G LTE, A1475) 2.1 GB Direct
iPad Air (A1476) None None
iPad Mini (Wi-Fi, A1489) 2.1 GB Direct
iPad Mini (Wi-Fi + 4G LTE, A1490) 2.1 GB Direct
iPad Mini (A1491) None None
iPad 4th Gen (Wi-Fi, A1458) 2.1 GB Direct
iPad 4th Gen (GSM, A1459) 2.1 GB Direct
iPad 4th Gen (CDMA, A1460) 2.1 GB Direct
iPad Mini (Wi-Fi, A1432) 2.1 GB Direct
iPad Mini (GSM, A1454) 2.1 GB Direct
iPad Mini (CDMA, A1455) 2.1 GB Direct
iPad 3 (Wi-Fi, A1416) 1.8 GB Direct
iPad 3 AT&T (GSM, A1430) 1.8 GB Direct
iPad 3 Verizon (CDMA, A1403) 1.8 GB Direct
iPad 2 (GSM, A1396) 1.8 GB Direct
iPad 2 (CDMA, A1397) 1.8 GB Direct
iPad 2 (Wi-Fi, A1395) 1.8 GB Direct
iPad 2 (Rev A, A1395) 1.8 GB Direct

How to Update iOS Version on iPhone, iPad & iPod Touch

If you have a need to upgrade the iOS version on your iPhone, iPad or iPod touch, you can follow the two guide below to start. There are two ways to go.

Directly Update the iOS on Your iOS Device (OTA)

This is the easiest way to directly get the iOS updated on your device.

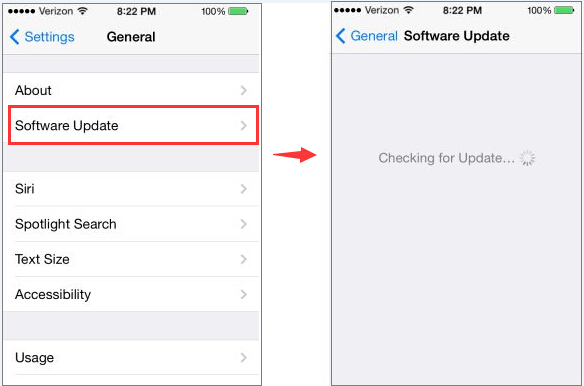
Step 1. On the Home screen, open SettingsGeneral

Step 2. Select "Software Update" and it will automatically start checking for the latest iOS.
Check iOS Update

Step 3. Click "Download and Install" button to start downloading the latest iOS package.

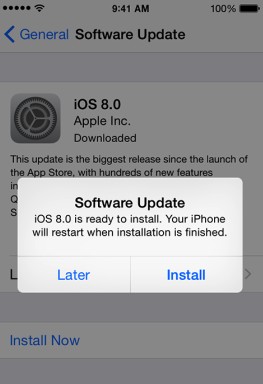
Step 4. After the download is finished, click "Install". Then your device will start install and then reboot.
Install iOS Update

Now you can enjoy the latest iOS immediately on your iPhone, iPad or iPod touch!

Update iOS on iPhone, iPad, iPod Touch via iTunes

If your iOS device is not connected to Wi-Fi, the OTA update would take a very long time. In this case you can upgrade the iOS by using iTunes.

Step 1: Download latest iTunes HERE and install it on your Mac/PC

Step 2. Connect your iPhone, iPad, or iPod touch using USB cable, launch iTunes on your Mac/PC.
Launch Latest iTunes

Step 3. Click iPhone, iPad, or iPod icon in the top left navigation bar and get into Summary tab.

Step 4. Click Check for Update / Update button, or click Restore… instead if want to wipe your device with updated software.
Update iOS via iTunes

Step 5. Wait for a second till an update box shows up, click Download and Update in the popup menu and agree to any terms or conditions.

Step 6. Unlock your device with your passcode if prompted. The update may take a few while and your device will reboot once or twice, please wait patiently. DO NOT disconnect your device until the update is complete.

Your device is successfully update when you see while Hello screen. Follow the on-screen instructions to start using the newly updated device.

Notice:

  • Please make sure you have enough free space on your iOS device to update using iTunes, you may need to delete some content on it.
  • The latest iTunes and backup is always suggested in case you fail to update or lose important information during update.

How to Identify the iPhone iPad iPod Firmware

Commonly, Apple doesn’t go out of its way to tell you where you can download the firmware files before it updates your iPhone. When you want to update or restore your device, you need to download the correct firmware. Here we provide 3 easy steps to help you identify the current firmware of iPhone/iPad/iPod Touch instantly.

Step 1: Identify your iPhone/iPad/iPod Model

  1. Look at the back of your device. There is a word "iPhone"(or iPad) down towards the center bottom.
  2. Then you will see the print about iOS device. At the end of the first line you will see "Model" and 5-word string following.
  3. Identify the model number of your device by put the 5-word string into the box below and submit.


    If you use an iPod touch and want to figure out its model, please check here.

Step 2: Check the iOS version of the device

After identifying your device model, please follow the guide to identify the current iOS version of your device. With both device model and iOS version, you will download the compatible firmware.

Step 3: Download the firmware for your device

Here is a list of the iPhone/iPad/iPod Touch model and the iOS version, you can select one from the drop-down box and click Download button to get the correct firmware of your device.

Click here to select and download the correct firmware of your device!

How to Downgrade iPhone/iPad/iPod Touch iOS 6.1.3 to iOS 6.1.2/6.0.1/5.1.1

iFaith allows you to downgrade iOS 6.1.3 to lower iOS version like iOS 6.1.2, iOS 6.0.1 and iOS 5.1.1 with SHSH blobs. What’s more, you can downgrade the systems of your iPhone, iPad or iPod touch to any other older iOS by this way.

Notice:

  • Your device must be JAILBROKEN when it was running the iOS version that you plan to downgrade to, or you cannot get the SHSH Blobs.
  • The Latest version iFaith 1.5.9 supports iOS 3.x to 6.1.3, here we show the example of downgrading iOS 6.1.3 to 5.1.1 with iFaith 1.5.9 on iPhone 3G(S).

Preparations:

Firstly please make sure you have backed up the device in case you may loss any important information during the downgrading. If you don’t need the backup, please just skip step 1&2 and start from step 3.

Step 1: Download the latest iTunes

If you have already installed iTunes, make sure you have updated it to the latest version.

Step 2: Back up your device

  • Plug into your device on your Mac and enter iTunes
  • Right click the device name in the sidebar list shown below
  • Click Back Up and wait for the sync to finish

Back Up

Step 3: Required Tools

Reafy to Go!

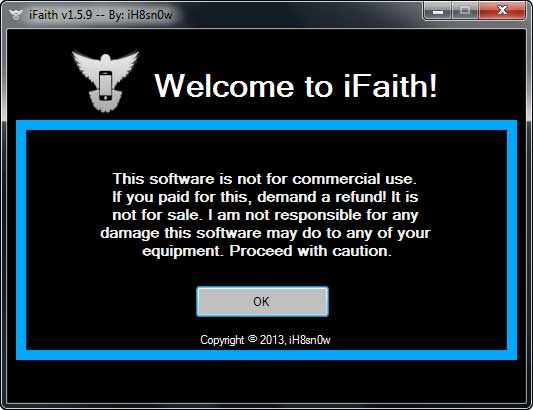
Step 1. Unzip iFaith 1.5.9 and open it, click "OK"
Open iFaith 1.5.9

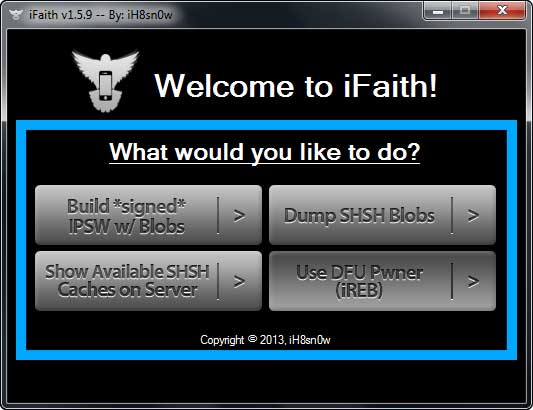
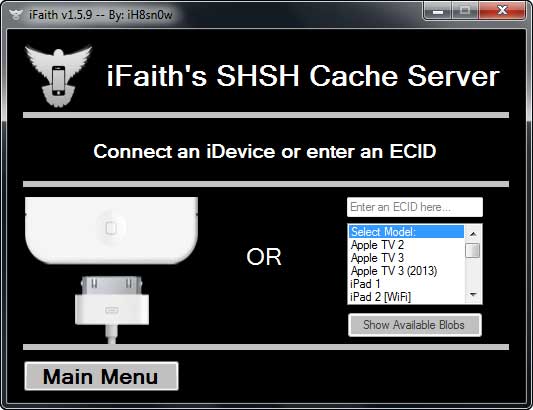
Step 2. Click " Show Available SHSH Caches on Server"
Enter iFaith 1.5.9

Step 3. Plug your iPhone 3G(S) to PC by USB
Select Right SHSH blobs

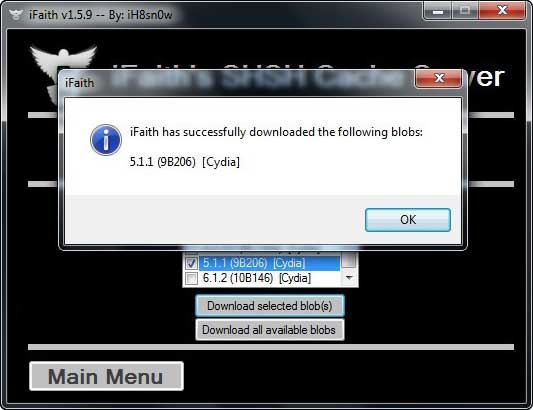
Step 4. After your device is detected and choose the relevant blobs. Select for iOS 5.1.1 and click "Download selected Blobs"
Download relevant SHSH blobs

Step 5. Go to "Main Menu" and click "Build *signed* IPSW w/Blobs"
Go back to Main Menu

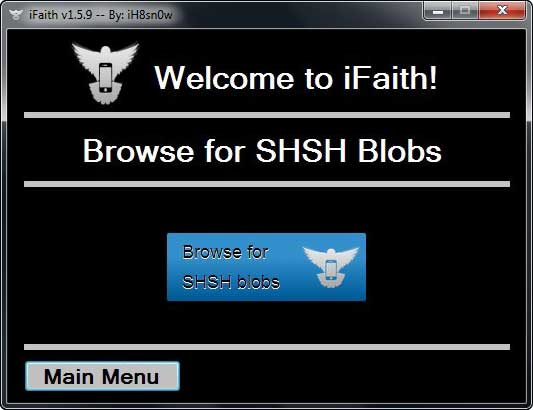
Step 6. Click "Browse for SHSH Blobs"
Browse SHSH blobs

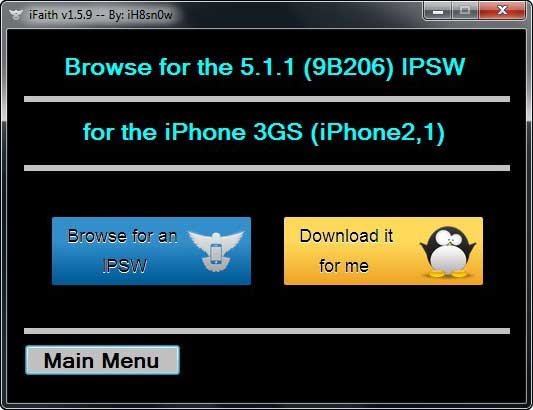
Step 7. Click "Browse for an IPSW" and select the iPhone 3GS iOS 5.1.1 Firmware you downloaded; or "Download it for me" to allow iFaith to do it for you
Browse IPSW

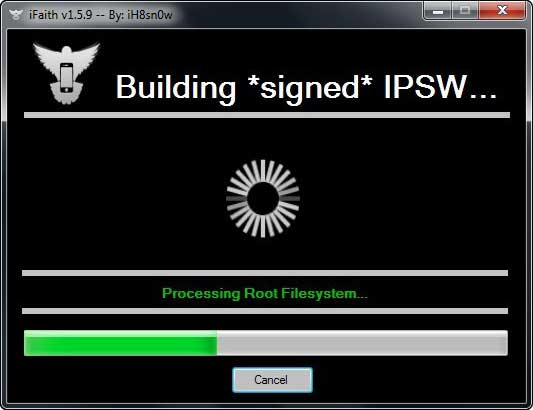
Step 8. Build IPSW. iFaith begins to creat iOS 5.1.1 custom firmware for iPhone 3G(S). It takes a little bit time, please wait and don’t interrupt the process until builded IPSW. The firmware will be saved on your desktop.
Create iOS 5.1.1 custome firmware

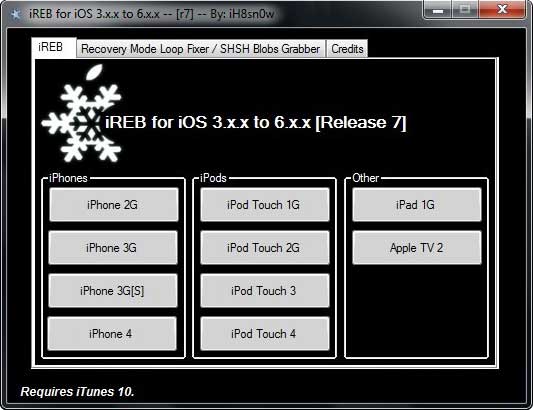
Step 9. Turn off your iPhone and Unzip the downloaded iReb r7, run it as administrator. Choose your device from the list in iReb r7 and prepare to enter DFU mode.
Open ired r7

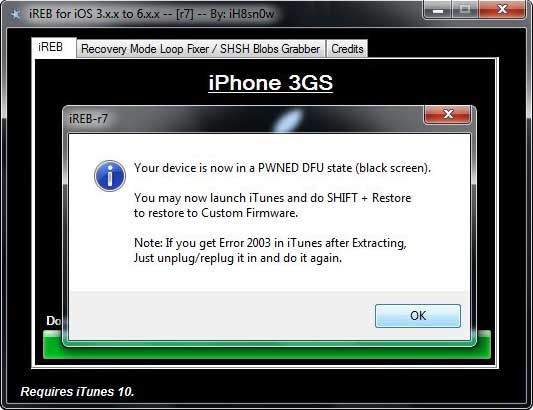
Step 11. After you see the message, please lauch iTunes, go into connected device window, holding Shift and click Restore button.
Enter DFU state

After that, please choose the firmware saved in Step 8 and wait till the end of the process. Your device will be successfully downgraded.

How to Downgrade iOS 7 to iOS 6

If you had upgraded your iOS device to iOS 7 Beta and want to downgrade it back to iOS 6, you need to download the latest iOS 6 IPSW file for your iOS device first.

Notice:

  • If you are using iPhone 5, that’ll be iOS 6.1.4.
  • If you have an iPhone 4S, an iPhone 4, or iPod touch 5th-generation, that’ll be iOS 6.1.3.

Preparations:

If you already made a backup for your device or don’t want to back up it, please skip the first 2 steps below and start from Step 3 directly. However, the backup is always suggested in case you lose important information during downgrading.

Step 1: Download latest iTunes HERE
You can skip this step if you already have iTunes installed on your computer.

Step 2: Back up your device:

  • Plug into your device and launch iTunes
  • Right click the device name in the sidebar list
  • Select Back Up and wait for the sync to finish
iPhone Backup

Step 3: Download the right iOS 6 IPSW file below

Ready to Go!

Step 1. Plug your iOS device and put it in DFU mode, NOT recovery mode.

  1. Plug your iOS device into your Mac or Windows PC and launch iTunes.
  2. Turn the iPhone off by holding down the Power button at the top of the iPhone
  3. Make the phone go into DFU mode:
    • Hold down both the Power button and Home button together for exactly 10 seconds
    • If you see the Apple logo, you’ve held them too long and will need to start again.
    • Release Power button but keep holding the Home button until a message appears in iTunes telling you an iPhone in recover mode has been detected
  4. If the screen stays completely black, that’s it! Your iPhone, iPod touch, or iPad should now be in DFU mode.

Step 2. Once your device is in DFU mode, you’ll see a message pop up from iTunes saying the device can’t be used until it’s restored. Just click "OK".

Recovery Mode

Notice:

  • Make sure that if you see the restore logo, iTunes logo or any message on the screen, your iOS device is not in DFU mode but Recovery mode. You need to do it again by following the steps above until the screen is completely black.

Step 3. Hold down the Alt or Option key on Mac (Shift for PC users) on keyboard and click on "Restore iPhone" in Tunes.

restore iphone

Step 4. Choose the right firmware for iOS 6 you download in advance, and click "Open".

open firmware

Step 5. iTunes will now restore your iOS device back to its iOS 6 version. After a restore, it will reboot eventually and be downgraded to iOS 6 successfully.

Notice:

At present there is no jailbreak for iOS 6.1.3, if you would like to jailbreak your device and use Cydia apps, please try to downgrade to iOS 6.1.2.

Remove OTA Software Update Badge on iOS

For a jailbroken iPhone or iPad user, it can be very annoying to receive the OTA software update notification when a new iOS version is released. Updating the iOS will remove your jailbreak and you are probably unable to jailbreak your device again in near future.

Software update badge

Is there any way to remove the update notice badge without updating the iOS? Yes! Here is how it goes with the tweak called noOTA badge:

  1. Open Cydia and search "noOTA badge".
    Search for noOTA badge
  2. Tap it to enter install page when it shows up in the results.
    Install noOTA badge
  3. Touch "Install – Confirm" to install noOTA badge to your iPhone, iPad or iPod.
    noOTA badge installed
  4. Re-spring or reboot your device, you will see that the badge notice on Settings is removed.

    Software update badge removed

Please notice that you don’t need to do any configuration after installing this tweak. In addition, it doesn’t show up in settings, and no icon. The only way to find it is to locate in Cydia – Packages.

How to Remove Cydia Update Notification

To experience more applications that AppStore cannot guarantee, you need to jailbreak your device. Then the annoying question comes: there are always some update notifications appear on the Cydia icon. However, the installation and configuration of the AppFlow will help you out easily.

  1. Lunch Cydia and install AppFlow in the searching bar.
    Install AppFlow
  2. Touch AppFlow icon to bring up the interface, and then tap the button shown.
    Open AppFlow
  3. In all of the drop-down applications, find Cydia and tap on it.
    Setup AppFlow
  4. In the four drop-down options of Cydia, click" Badge It"
    Badge It
  5. Input badge number "0" in the box and click "OK"
    Remove Badge

Now the update notification of the Cydia is removed:

Before Badge >>>>After Badge

How to Downgrade iOS 6.1.3 to iOS 6.1.2

Here we will show how to downgrade iOS 6.1.3 to 6.1.2 with Tinyumbrella and Sn0wBreeze. After downgrade you can easily jailbreak the iOS 6.1.2 device with Evasi0n.

Notice:

  • Your device MUST be jailbroken before when it was still iOS 6.1.2, or it cannot be downgraded.
  • Make sure you HAVE SAVED your device’s SHSH blobs using Tinyumbrella 6.12.00 before you decide to downgrade.
  • Sn0wBreeze jailbreak tool only supports Windows system, so Mac OS X users CANNOT downgrade at the moment.
  • iPhone 4S, iPhone 5, iPad Mini, iPad 2, The New iPad and other iOS devices based on A5 chip CANNOT be downgraded at the moment.

Preparations:

Notice: If you already made a backup for your device or don’t want to back up it, please skip the first 2 steps below and start from step 3 directly. However, the backup is always suggested in case you lose important information during downgrading.

Step 1: Download latest iTunes HERE
You can skip this step if you already have iTunes installed on your computer.

Step 2: Back up your device:

  1. Plug into your device and launch iTunes
  2. Right click the device name in the sidebar list
  3. Select Back Up and wait for the sync to finish

    backup

Step 3: Download required tools according to your device systems:

Ready to Go!

  1. Download and Extract sn0wbreezedl-master.zip and launch the file called sn0wbreeze-v2.9.14.exe in the folder.
  2. Click the blue arrow, choose "Browse for an ipsw" and select the iOS 6.1.2 firmware IPSW file you downloaded just now.
  3. Select bootrom, and click the blue arrow again.
  4. Select "iFaith Mode" and browse the SHSH blobs files for iOS 6.1.2 firmware IPSW and select an associated one.
  5. Click "Build IPSW", and Sn0wBreeze will begin to setup the custom firmware.
  6. Now please make your device go into the DFU mode by following the steps below:
    • Quickly hold "Power" button on your for 3 three seconds
    • Keep holding the "Power" button and press "Home" button for 10 seconds.
    • Release "Power" button but keep pressing "Home" button. After this your device’s screen will go completely black, don’t worry it’s just a part of the process.
  7. Now, ireb utility will patch the iboot.
    Notice: If there is any other iTunes or restore logo on your device’s screen, it means you are not in DFU mode yet and place it in the DFU mode once again. To exit the DFU mode, just press Home and Power button until the Apple logo is visible.
  8. Run iTunes, while pressing "Shift" Key and select "Restore". Select the custom firmware IPSW file that you made in step 6 and let iTunes downgrade iOS 6.1.3 to 6.1.2.

After this, your device will be successfully downgraded and will run iOS 6.1.2 firmware. If there are any mistakes, try above instructions step by step once again. If the downgrade is successfully completed, you can start enjoying the jailbreak and amazing apps from Cydia.

Downgrade iPad 2 from iOS 6 to iOS 5.1.1

To downgrade iPad 2 from iOS 6.x to iOS 5.1.1, you must have saved both iOS 5.1.1 and iOS 4.x SHSH blobs locally on your computer, or stored on Cydia, and you need to have RedSn0w, correct iOS 5.1.1 firmware and iOS 4.x firmware for your device.

Notice:

  • Your device MUST be jailbroken before when it was still iOS 5.1.1 and iOS 4.x, or it cannot be downgraded.
  • It does NOT support any other iOS version or iOS devices other than iPad 2 iOS 6. To downgrade other devices, please check here!

Preparations:

Notice: If you already made a backup for your device or don’t want to back up it, please skip the first 2 steps below and start from step 3 directly. However, the backup is always suggested in case you lose important information during downgrading.

Step 1: Download latest iTunes HERE
You can skip this step if you already have iTunes installed on your computer.

Step 2: Back up your device:

  1. Plug into your device and launch iTunes
  2. Right click the device name in the sidebar list
  3. Select Back Up and wait for the sync to finish

    backup

Step 3: Download required tools according to your device systems:

Ready to Go!

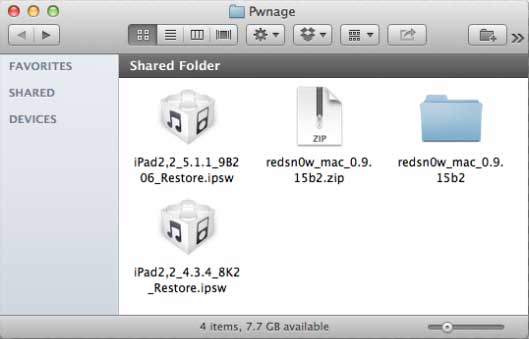
1. Create a folder on your computer desktop named "Pwnage", and put the downloaded firmware and RedSn0w in the folder like blow:

pwnage

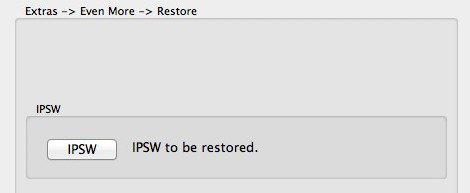
2. Open Redsnow, and click Extras > Even more > Restore, you will see the menu appears below:

restore-ipsw

3. Click on "IPSW" from the Restore menu, choose the iOS 5.1.1 firmware which is the IPSW you would like to restore to, then click "Open" on the window.

open

4. After that, connect your iPad 2 to the computer in normal mode and click "OK"

connect device

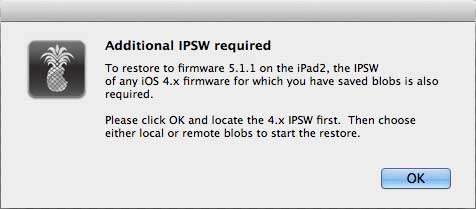
5. You will be informed that a 4.x IPSW will be needed to continue. Click "OK"

additional ipsw

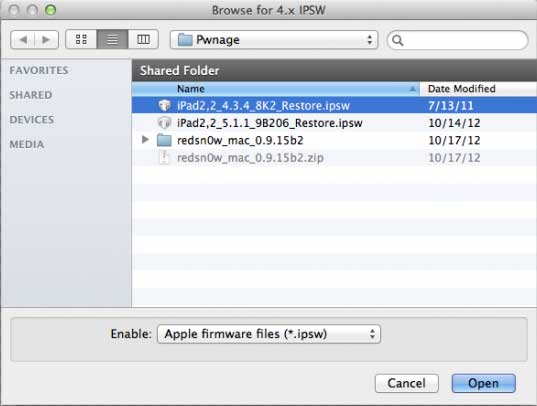
6. Select 4.x firmware IPSW from the "Pwnage" folder and click "Open"

4-firmware

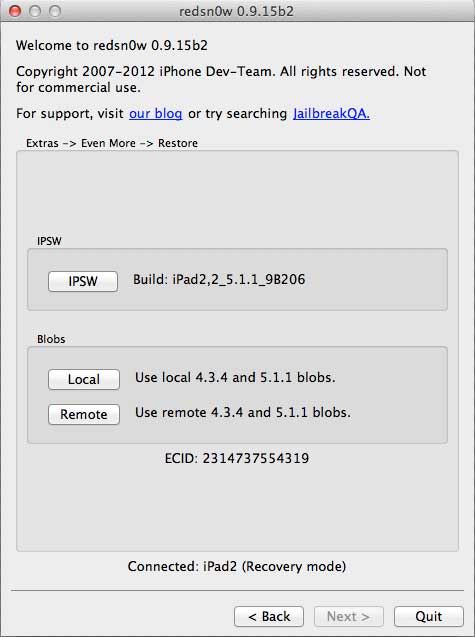
7. Now you have placed your iPad 2 into recovery mode.

recovery mode

8. RedSn0w will check Cydia to see whether you have saved the SHSH blobs, if there is no correct blobs being found, click on "Remote" button to try again or click on "Local" button to search for blobs on your computer.

local

9. Then RedSn0w will prepare the 4.x restore image and prompt you to put your iPad 2 into DFU mode.

4-restore

DFU mode

10. RedSn0w will begin to restore to iOS 4.x, after restoring, it places your device back into recovery mode to prepare the iOS 5.1.1 restore image. iOS 5.1.1 will be restored.

11. You will see "Restore successful" picture when the restore is completed.

restore successful

Keep in mind, if you don’t have the saved SHSH blobs for both iOS 5.x and iOS 4.x, you are unable to downgrade your iPad 2 with iOS 6 following these instructions.

If you would like to re-jailbreak your iPad 2 running with iOS 5.1.1, please check this guide!

Downgrade iOS 6 to 5.1.1 in iPhone 4/3GS/iPod4

As the untethered jailbreak for iOS 6 is still unavailable, many of people choose to revert back to iOS 5.1.1 after upgrading our devices to iOS 6. Fortunately, there is a way to downgrade iOS 6 to 5.1.1 for those who are looking for an untethered jailbreak.

You will need to save SHSH Blobs for iOS 5.1.1 prior to downgrading from iOS 6. What’s more, if you had jailbroken the device when it was running on iOS 5.1.1, then you can downgrade it. If the device has never been jailbroken before, then it can’t be downgraded.

  • Supported Devices: iPhone 4, iPhone 3gs, iPod touch 4G
  • Unsupported Devices: iPhone 5, iPhone 4S, iPad 3

Preparations:

Firstly make sure to back up the device in case you may loss any important information during the downgrading. If you don’t need the backup, please just skip step 1&2 and start from step 3.

Step 1: Download the latest iTunes

If you have already installed iTunes, make sure you have updated it to the latest version.

Step 2: Back up your device

  • Plug into your device on your Mac and enter iTunes
  • Right click the device name in the sidebar list shown below
  • Click Back Up and wait for the sync to finish

Back Up

Step 3: Download required tools

Download the relevant iOS 5.1.1 IPSW firmware:

Download the latest RedSn0w:

Ready to Go!

Turn off your device and connect it to computer, then put the device running iOS 6 into DFU mode following these steps:

  • Hold down the Power button on iOS device for 3 seconds.
  • Without releasing the Power button, simultaneously hold the Home button and keep them pressed for 10 seconds.
  • Now release the Power button while keeping the Home button pressed or up to 15 seconds.

Step 1: Open RedSn0w and click on "Extras" button.
click Extras

Step 2: Click on "SHSH blobs" button.
click SHSH blobs

Step 3: Click on "Stitch" button.
click Stitch

Step 4: Click on "IPSW" and select iOS 5.1.1 IPSW firmware which you have downloaded in Preparations.
click IPSW

Step 5: Click on "Local" and select the .shsh file, or please check "Cydia" to locate SHSH blobs if you have stored the file in Cydia.
Local or Cyida

Step 6:
After that, RedSn0w will start to integrate the SHSH blobs into the firmware to create Custom FirmWare. It’s the key of the downgrade.

Step 7: Switch to the Extras interface of RedSn0w by clicking twice on "Back" button, then click on "Pwned DFU" to enter pwned DFU mode.
click Pwned DFU

Step 8:
Open iTunes, it will detect that your device has entered into recovery mode. For windows users, hold "Shift" on the keyboard and check "Restore". For Mac users, hold "Option" and check "Restore". Then select the created Custom FirmWare.

Step 9: iTunes begins restoring your device, it is normal to get iTunes Error-1 message.
Error-1

Step 10: Now you need to reopen RedSn0w and click on Extras > Recovery Fix, and your device will enter DFU mode to fix the recovery.
click Recovery fix

When it is finished, you should have already downgraded iOS6 to iOS5.1.1 on your iDevice.

In addition, downgrading the iPad 2 from iOS 6 to iOS 5.x requires the saved SHSH blobs for both 5.x and 4.x. If you are currently using iPad 2 running on iOS 6 and want to downgrade it, please learn more here.